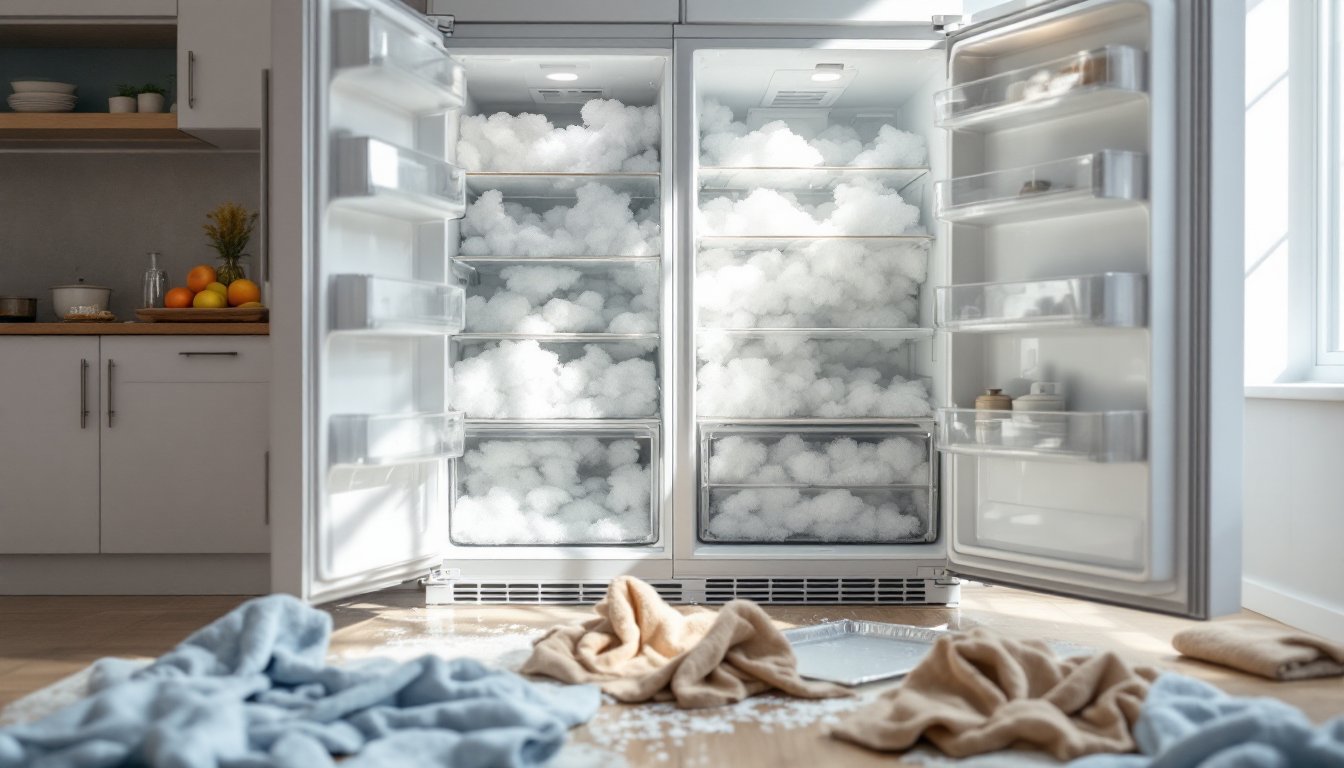
Ice buildup in a refrigerator doesn’t just make it harder to close the door, it forces the compressor to work overtime, driving up energy bills and shortening the appliance’s lifespan. Most manual-defrost and older units need periodic defrosting to keep running efficiently, but even frost-free models can develop ice in the freezer compartment when door seals fail or humidity creeps in. Knowing how long to defrost a refrigerator (typically 4-8 hours for natural thawing, depending on ice thickness) and the proper technique prevents water damage, food spoilage, and unnecessary wear on cooling components. This guide walks through the complete defrosting process, from recognizing the warning signs to cleaning and restarting the unit.
Table of Contents
ToggleKey Takeaways
- Defrosting your refrigerator regularly prevents frost buildup from forcing your compressor to work overtime, potentially increasing energy consumption by 20-30% and shortening your appliance’s lifespan.
- Natural defrosting is the safest method, typically taking 4-8 hours depending on ice thickness, and avoids the risk of damaging refrigerant coils with sharp tools or excessive heat.
- Inspect your refrigerator for warning signs like visible frost thicker than ¼ inch, frequent compressor cycles, water pooling, or difficulty closing doors—all indicators that defrosting is needed.
- After defrosting, clean the defrost drain, inspect and replace worn door seals if necessary, and clean condenser coils every 6 months to maintain efficiency and prevent frost from returning quickly.
- Keep doors closed as much as possible and check the defrost drain monthly to reduce humidity and prevent ice accumulation in the first place.
Why Defrosting Your Refrigerator Matters
Frost buildup acts as an insulator, blocking cold air from circulating properly. When ice layers exceed ¼ inch thick, the compressor runs longer cycles to maintain set temperatures, increasing electricity consumption by 20-30% in some cases. That extra runtime also generates more heat around the condenser coils, accelerating wear on the motor and shortening the unit’s expected 10-15 year lifespan.
Ice accumulation reduces usable storage space in both the freezer and refrigerator compartments. A half-inch of frost can claim several cubic feet, pushing food against walls and blocking vents. In severe cases, ice locks drawers in place or prevents doors from sealing completely, allowing warm, humid air to enter and perpetuating the freeze cycle.
Regular defrosting also prevents freezer burn on food. Ice crystals form when moisture escapes from improperly sealed packages, and a frosty environment accelerates this process. Keeping coils and walls clear maintains stable humidity levels, preserving food quality and reducing waste.
Signs Your Refrigerator Needs Defrosting
Visible frost on freezer walls or around door seals is the most obvious indicator. Check the thickness by pressing a ruler against the ice, anything beyond ¼ inch warrants defrosting. Frost-free models shouldn’t show buildup: if they do, inspect door gaskets for tears or gaps that let warm air in.
Listen for longer or more frequent compressor cycles. If the motor runs continuously or clicks on every few minutes, ice may be choking airflow over the evaporator coils. This symptom often coincides with warmer-than-normal refrigerator temperatures, even when the thermostat is set correctly.
Water pooling inside or under the unit signals drainage issues caused by ice blocking the defrost drain. In manual-defrost models, this happens when meltwater from normal use freezes before draining. Standing water can damage shelves, promote mold, and leak onto flooring.
Difficulty closing doors or drawers that stick usually means ice has expanded into the cavity. Don’t force them, this can crack plastic components or damage hinges. Routine home maintenance checklists often recommend inspecting refrigerator seals and frost levels every three months to catch problems early.
Preparing for the Defrosting Process
Start by emptying the refrigerator and freezer. Transfer perishables to a cooler with ice packs, or use a neighbor’s unit if defrosting will take more than a few hours. Discard items past their expiration dates and consolidate half-empty condiment bottles, defrosting is a good excuse to purge.
Unplug the refrigerator from the wall outlet. Don’t rely on turning the thermostat to zero: unplugging prevents accidental restarts and eliminates electrical hazards when water pools on the floor. Confirm the outlet is dead by testing with a non-contact voltage tester if you’re working in a damp area.
Place towels along the base of the unit and on the floor directly in front. Use old bath towels or absorbent rags, you’ll need several. Position a shallow baking sheet or roasting pan inside the freezer to catch drips, especially if the defrost drain is clogged. Have a mop and bucket on standby for larger spills.
Open both doors fully and remove shelves, drawers, and bins. Wash these separately in warm, soapy water while the unit defrosts. This saves time later and prevents you from slipping drawer runners back into a wet cavity.
Safety note: Wear rubber gloves when handling ice or working near standing water, especially if you use any speed-defrosting tools. Keep children and pets away from the workspace to avoid slips on wet floors.
Step-by-Step Defrosting Methods
Natural Defrosting (Safest Method)
Leave the refrigerator unplugged with doors open and let ice melt at room temperature. How long to defrost refrigerator naturally depends on frost thickness and ambient temperature, plan for 4-6 hours for light buildup (¼ inch or less), and 8-12 hours for heavy ice (½ inch or more). A room at 68-72°F defrosts faster than a cool basement or garage.
Place a box fan in front of the open freezer to speed air circulation. This can cut defrosting time by 30-40% without introducing heat that might warp plastic components. Rotate towels every hour as they soak up meltwater, wringing them into a bucket.
Don’t chip or scrape ice with metal tools. A plastic spatula can gently nudge loosened chunks into the drip pan, but forcing it risks puncturing the evaporator coils hidden behind interior walls. Punctured coils leak refrigerant, turning a simple maintenance task into a costly repair requiring an HVAC technician.
Once all ice has melted, wipe down interior surfaces with a towel. Check the defrost drain (usually a small hole at the back of the freezer floor) and clear any debris with a turkey baster or pipe cleaner. Pour a cup of warm water mixed with a teaspoon of baking soda down the drain to flush it.
Speed Defrosting Techniques
If time is tight, place a pot of boiling water on a trivet or folded towel inside the freezer. Close the door for 10-15 minutes, then remove the pot and wipe away softened ice. Repeat as needed. This method can reduce how long to defrost a refrigerator to 2-4 hours, but requires supervision to prevent excess heat from warping shelves or damaging door seals. Experts at Good Housekeeping recommend this for moderate frost layers.
A hair dryer on low heat works for spot-treating stubborn ice around vents or hinges. Hold it at least six inches from surfaces and keep it moving to avoid melting plastic trim. Never use high heat or point it directly at coils. This is a finishing technique, not a primary defrost method, you’ll spend 20-30 minutes targeting small areas.
Avoid space heaters, heat guns, or any open flame. These introduce too much heat too quickly, cracking interior liners and posing fire hazards. Never use a steamer on the interior, the moisture can seep into insulation and promote mold growth.
What not to do: Don’t pour hot water directly onto ice or walls. Thermal shock can crack the plastic liner or glass shelves. Don’t use sharp objects like ice picks, screwdrivers, or knives, one slip can puncture refrigerant lines, which contain pressurized coolant regulated under EPA Section 608.
Cleaning and Maintenance After Defrosting
Mix two tablespoons of baking soda per quart of warm water and wipe down all interior surfaces with a clean sponge. This removes food residue and neutralizes odors without leaving chemical residue that could taint food. Pay attention to door gaskets, crisper drawer tracks, and the drip tray under the unit.
Inspect door seals for cracks, tears, or stiffness. Press a dollar bill between the seal and the frame, then close the door. If the bill slides out easily, the gasket isn’t sealing properly and should be replaced. Worn seals let warm air in, causing frost to return quickly.
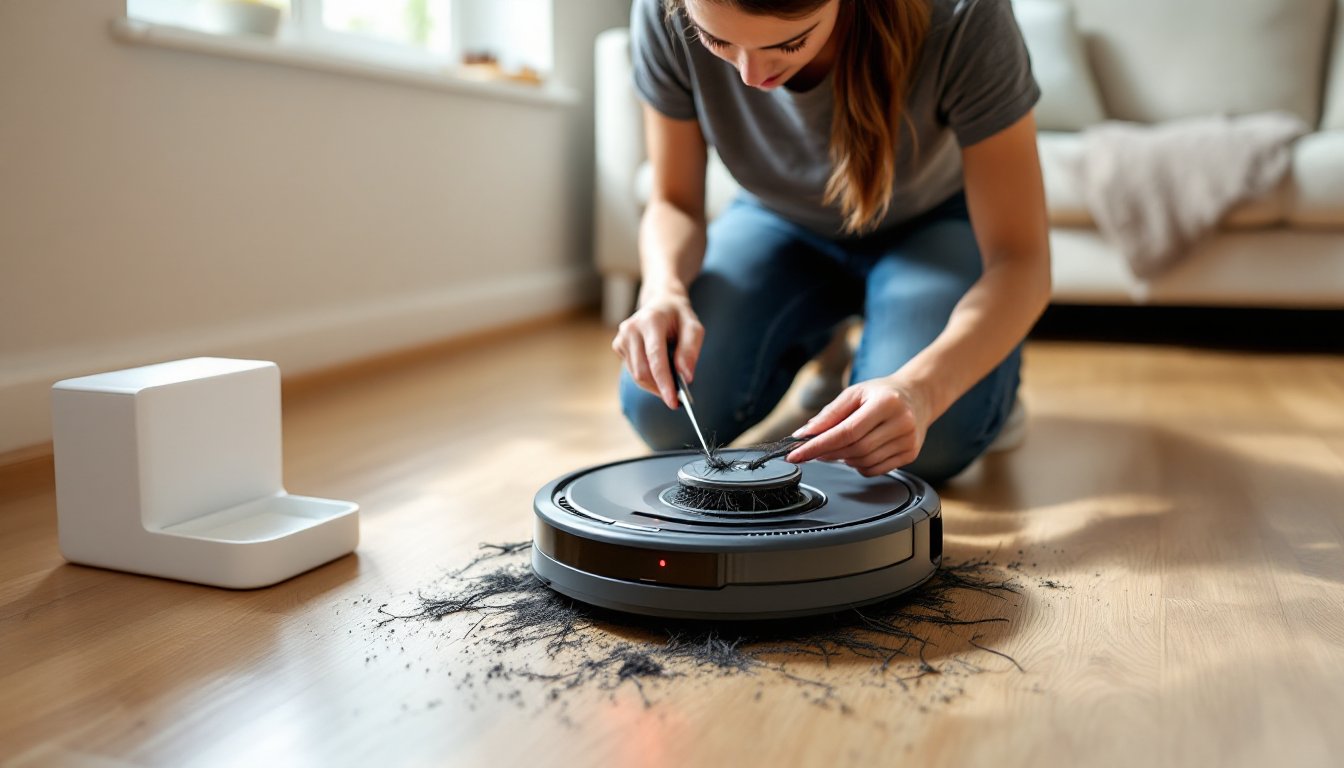
Clean the condenser coils while the unit is unplugged. These are usually accessible from the back or bottom front grille. Use a coil brush or vacuum with a brush attachment to remove dust and pet hair. Dirty coils force the compressor to work harder, offsetting efficiency gains from defrosting. Plan to clean coils every six months in typical households, or quarterly if you have pets.
Once all surfaces are dry, plug the refrigerator back in and set the thermostat to the recommended setting (usually 37-40°F for the fridge, 0°F for the freezer). Let it run empty for 30-60 minutes before reloading food. This ensures temperatures stabilize and the compressor cycles normally.
Reload food strategically. Place items with the nearest expiration dates toward the front, and avoid overcrowding shelves, blocked vents force the compressor to run longer. Wipe down jars and bottles before returning them to prevent transferring grime to freshly cleaned surfaces.
Preventive tips: Keep the door closed as much as possible to reduce humidity. Check the defrost drain monthly by pouring a cup of water down it, if it doesn’t drain, clear it before ice builds up. In humid climates or if the unit is in a garage, consider running a small dehumidifier nearby to reduce frost formation. For more seasonal upkeep strategies, check kitchen maintenance guides that cover appliance care alongside other household tasks.