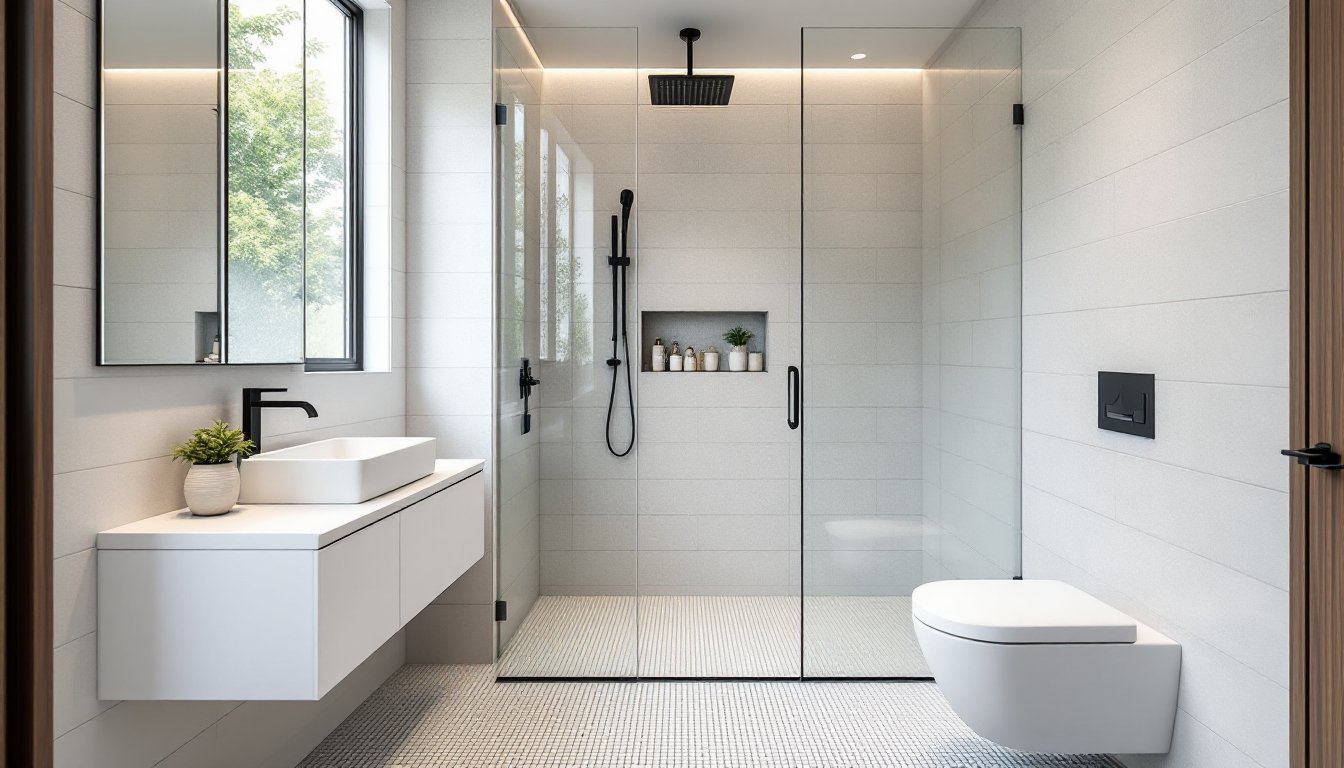
Wet rooms are gaining traction in small bathrooms for good reason. They eliminate the tub, skip the shower curb, and turn the entire floor into a waterproofed, walk-in shower zone. The result? More usable square footage, fewer visual barriers, and a sleek, modern aesthetic that works in tight quarters. If you’re working with a cramped 5×7 or awkwardly shaped space, a wet room can transform what feels like a closet into a functional, spa-like retreat. But it’s not just about looks, proper waterproofing, drainage, and material selection are non-negotiable.
Table of Contents
ToggleKey Takeaways
- A small wet room bathroom eliminates shower enclosures and tubs, turning the entire waterproofed floor into a walk-in shower that makes cramped spaces feel larger and more open.
- Proper waterproofing with a liquid or sheet membrane, adequate slope (¼ inch per foot), and correct drain sizing are critical to prevent subfloor damage, mold, and costly repairs in wet room construction.
- Choose slip-resistant porcelain or ceramic tile for floors (DCOF rating 0.42+), use epoxy grout instead of cement for longevity, and opt for wall-mounted fixtures to maximize usable space and simplify cleaning.
- Wet room installation requires professional help for plumbing modifications, custom mortar slopes, and code compliance, though confident DIYers can handle pre-sloped pans, membrane application, and tile work.
- A small wet room remodel costs $8,000–$15,000 with mid-range finishes, takes 2–3 weeks professionally or 4–6 weekends for DIY, and requires permits to ensure code compliance and protect resale value.
What Is a Wet Room Bathroom and Why Choose One?
A wet room is a fully waterproofed bathroom where the shower area isn’t enclosed by a traditional pan or curb. The entire floor is sloped toward one or more drains, allowing water to flow freely without pooling. In small bathrooms, this setup eliminates the footprint of a shower enclosure or tub, opening up the room visually and physically.
Why go this route? First, accessibility. No step-over threshold means easier entry for kids, aging-in-place homeowners, or anyone with mobility concerns. Second, easier cleaning. Fewer seams, no shower door tracks, and a continuous floor mean less scrubbing grout in tight corners. Third, it makes a small bathroom feel larger. When walls and glass don’t chop up sightlines, even a 40-square-foot bath can feel surprisingly open.
That said, wet rooms aren’t plug-and-play. They require more robust waterproofing than a standard shower install, and drainage must be planned carefully to avoid standing water. If your subfloor is wood-framed (most residential construction), you’ll need a pan liner or liquid membrane system that extends well beyond the shower zone, typically the entire floor and 6–12 inches up the walls. Concrete subfloors are more forgiving but still need proper slope and membrane coverage.
Wet rooms also shine in homes where space is at a premium but style isn’t negotiable. Curated design galleries often feature wet rooms in urban apartments and compact ADUs, where every inch counts and a seamless look justifies the extra install effort.
Design Essentials for Small Wet Room Bathrooms
Waterproofing and Drainage Requirements
Waterproofing is the backbone of any wet room. Miss a seam or skimp on membrane coverage, and you’re looking at subfloor rot, mold, and expensive tear-outs down the line.
Start with a pan liner or liquid-applied membrane. Sheet membranes (like Schluter KERDI or similar PVC/polyethylene products) work well for DIYers who can follow instructions and overlap seams correctly. Liquid membranes (RedGard, AquaDefense) go on with a roller or trowel and are more forgiving around drain flanges and corner transitions. Either way, the membrane must cover the entire floor, run up walls at least 6 inches (code minimum in many jurisdictions: 12 inches is safer), and integrate with the drain assembly using a clamping ring or bonding flange.
Slope is critical. The floor should pitch at least 1/4 inch per foot toward the drain. In a small wet room, that might mean the drain sits in the center or along one wall, depending on layout. Pre-sloped foam pans (Schluter, Wedi) simplify this step: they’re lightweight, cut with a utility knife, and come with integrated slope. If you’re building the slope with mortar, expect a two-pour process: a pre-slope under the liner, then a top bed over it. That’s a two-day job minimum and not beginner-friendly.
Drain size matters. A standard 2-inch drain handles about 8 GPM (gallons per minute), fine for most residential showerheads. If you’re installing a rain head or multi-jet system, consider a linear drain (Infinity Drain, Schluter KERDI-LINE). Linear drains are longer and narrower, often spanning one wall, and they handle higher flow rates while making tile layout cleaner.
Choosing the Right Materials and Finishes
Tile is the go-to for wet room floors and walls, but not all tile is created equal. For floors, choose porcelain or ceramic with a slip-resistant finish, look for a DCOF (Dynamic Coefficient of Friction) rating of 0.42 or higher. Small-format tiles (1×1 or 2×2 mosaics) offer more grout lines, which improve traction. Larger tiles (12×24 or bigger) look sleeker but can be slippery when wet unless textured.
Wall tile can be larger and glossier since slip isn’t an issue. Rectified porcelain in 12×24 or 24×24 formats creates a modern, minimal-grout look. Light colors and vertical stacking patterns help small wet rooms feel taller and more open. Avoid tiny mosaics on all surfaces, they read busy in a confined space.
Grout choice is non-negotiable. Use epoxy grout for floors in wet rooms. It’s waterproof, stain-resistant, and won’t degrade under constant moisture. Standard cement grout (even sealed) will eventually crack or mildew in a wet-room environment. Epoxy is harder to work with, it sets fast and cleanup is fussy, but it’s worth the hassle for longevity.
For walls, consider large-format panels (like Corian Solid Surface or acrylic wall systems) if tile install feels daunting. These go up faster, have fewer seams, and, when installed over a waterproof backer, perform well in wet rooms. They’re pricier per square foot than mid-range tile but can save labor time.
Fixtures should be wall-mounted where possible. A floating vanity, wall-hung toilet, and wall-mounted faucet keep the floor clear, making the room feel bigger and cleaning easier. In a wet room, every floor-mounted item is another obstacle for water flow and another place for grime to collect.
Layout Ideas to Maximize Your Small Wet Room
In a tight footprint, layout is everything. A poorly placed drain or toilet can choke circulation and make the room feel cramped.
Corner drain placement works well in square or near-square bathrooms (5×5, 6×6). The toilet and vanity occupy one wall, and the opposite corner holds the drain. This keeps the “dry” zone as far from spray as possible, even without a partial glass panel.
Linear drain along one wall is ideal for narrow, galley-style wet rooms (say, 4 feet wide by 8 feet long). Run the drain parallel to the long wall, sloping the floor toward it. This setup lets you tile in clean horizontal runs and minimizes cuts. Many compact bathroom remodels use this layout to maintain a continuous sightline.
If you want to contain spray without losing the open feel, install a partial glass panel (sometimes called a “splash guard”). A single 30–36-inch fixed panel, floor-to-ceiling, can shield the toilet and vanity from direct shower spray while keeping the room visually open. Use 10mm tempered glass, not flimsy framed doors. The panel should be set in a metal channel at floor and ceiling (or wall-mounted with heavy-duty clamps) and sealed with clear silicone.
Storage is tricky in wet rooms since everything gets damp. Recessed niches in the shower wall (built during tile install, waterproofed with membrane) are the cleanest solution. Aim for at least one 12×24-inch niche for shampoo, soap, and razors. If wall framing doesn’t allow a recess, use a corner caddy with drainage holes, but skip suction-cup models: they fall off in steam. Wall-mounted shelves outside the direct spray zone work if you have the room.
Lighting and ventilation are non-negotiable. Install a properly rated exhaust fan (minimum 50 CFM for bathrooms under 50 square feet: bump to 1 CFM per square foot over that). Wet rooms generate more steam than standard showers, so consider a fan with a built-in humidistat that kicks on automatically. For lighting, use wet-location-rated recessed LEDs (IP65 or higher) in the ceiling. Under-cabinet or niche lighting adds ambiance but must be low-voltage and sealed.
Installation Considerations: DIY vs. Professional Help
Let’s be clear: wet room installation is not a beginner DIY project. If you’ve never tiled a shower, waterproofed a pan, or worked with mortar, this isn’t the place to start. That said, confident DIYers with tile and plumbing experience can handle it, if they’re methodical and willing to follow manufacturer specs to the letter.
What a DIYer can reasonably tackle:
- Installing a pre-sloped foam shower pan and drain kit (Schluter, Wedi)
- Applying liquid or sheet waterproofing membrane
- Tiling walls and floors (if you’ve done it before)
- Installing wall-hung fixtures (with backing properly placed during framing)
What usually requires a pro:
- Modifying floor framing to accommodate drain relocation or slope
- Pouring a custom mortar slope bed (especially multi-drain setups)
- Moving or re-routing plumbing lines (in many areas, this requires a licensed plumber)
- Ensuring code compliance with waterproofing, vent sizing, and accessibility standards (IRC, IPC)
Permitting is almost always required for wet room construction. This counts as a bathroom remodel involving plumbing, waterproofing, and often electrical (for new lighting or fan circuits). Inspections typically happen at rough-in (plumbing and framing) and before final finish (to verify membrane installation). Skipping permits is risky, it can complicate future sales and void homeowner’s insurance if water damage occurs.
Cost varies widely by region and finish level, but ballpark for a small wet room (40–50 square feet) in a typical U.S. market: $8,000–$15,000 for a contractor-led remodel with mid-range tile, quality waterproofing, and standard fixtures. High-end finishes (custom tilework, frameless glass, designer fixtures) can push that to $20,000+. DIY can cut labor by 40–50%, but you’re still looking at $3,000–$5,000 in materials if you’re buying quality membranes, tile, and fixtures.
As small-space design experts often emphasize, wet rooms deliver the most bang for the buck when the existing layout already clusters plumbing in one zone. Moving a toilet or drain across the room adds thousands in plumbing and floor work.
Timeline: A professional crew can complete a small wet room in 2–3 weeks (demo, waterproofing, tile, fixture install). DIY? Budget 4–6 weekends minimum, assuming no surprises. Tile alone takes time, don’t rush the mortar cure or grout cleanup.
Safety gear: Wear knee pads, safety glasses, and a dust mask during demo and tile cutting. Wet saws throw a slurry: goggles are non-negotiable. If mixing mortar or epoxy grout, nitrile gloves prevent skin irritation.
Conclusion
A small wet room can turn a cramped bathroom into a sleek, functional space, but only if the waterproofing and drainage are done right. Get the membrane coverage, slope, and materials dialed in, and you’ll have a low-maintenance, accessible shower that feels twice its size. Rush the prep or skip the code check, and you’re courting expensive repairs. Know your limits, pull permits, and don’t hesitate to bring in a pro for the technical stuff. The payoff is worth it.